
The first thing we'll cover is Paper textures. This is one of the features that really makes Painter shine, as it's a very dynamic and versatile way to add texture to something. It's strength lies in the fact that the paper texture is universal; unlike Photoshop where you will need to enable texture on brushes you want to use and then select the texture, paper textures in Painter will apply to all brushes that are set to one of the Grainy Cover modes, which I will explain more in-depth later on. The advantage of this is that you only need one type of texture brush and you can apply all kinds of different textures to it that you can edit on the fly, reducing the number of tools you need and saving time switching between different textures.
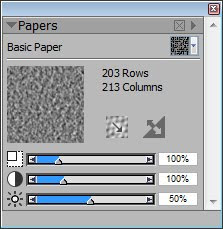
To start, click on Window -> Library Palettes -> Papers to open the Papers window. It should look something like this:
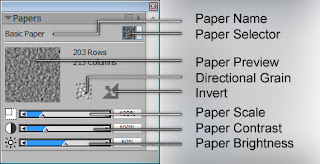
Using the options in the diagram above, you can edit your texture to get more variety and interest.
Paper Name - The name of the paper currently selected
Paper Selector - Click here to select different papers
Paper Preview - An image showing what the current paper looks like
Directional Grain - Changes how the paper reacts based on direction
Invert - Reverses the values of the texture, making white black and black white
Paper Scale - The size of the paper texture
Paper Contrast - How far apart the lightest and darkest values of the texture are
The important thing to remember with textures is this: The black parts of the texture will be painted with full opacity (or at the highest opacity of your brush), grays will paint at a medium opacity, and whites will not be painted at all. With this in mind, it's easy to get a variety of textures. Need an area to have more focused areas of texture that's not as thick? Just increase the brightness and contrast so there's less black and more white, therefore less texture and more empty space. Need to paint some additional texture without painting over the texture that's already there? Increase the scale of the texture so it's painting over a different set of pixels and will leave existing texture intact. Want to paint some more 3D looking texture? Paint in your darks, then Invert it and paint your lights on top. Experiment with these options to figure out how you can use them in your work.
Now you have a texture, but how do you use it? This will require some experimentation, a number of Painter's brushes will apply paper textures to them and will be useful for painting. I would recommend starting with the Large Chalk brush in the Chalk category. Using just the Large Chalk and Painter's default papers, you can get a whole variety of texture that will be useful for all kinds of things:
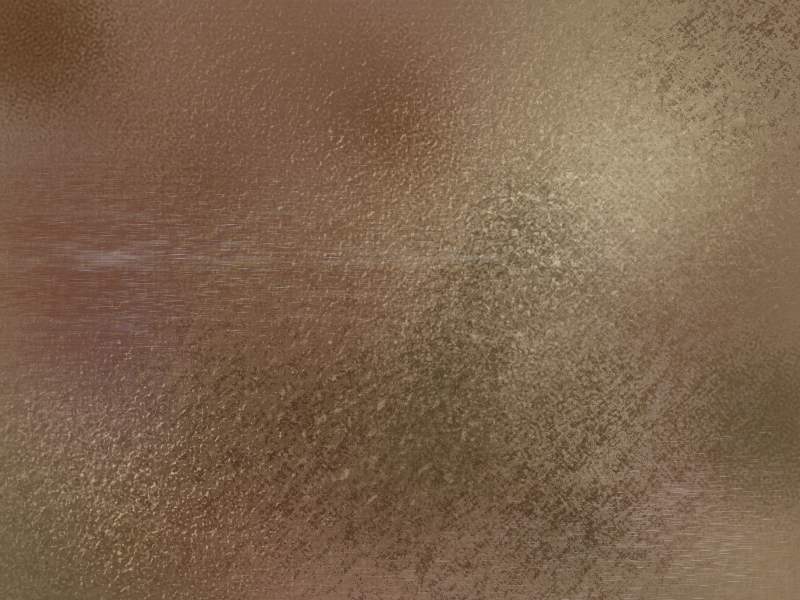
The textures above, though in need of more adjustment and subtlety, are reminiscent of traditional underpaintings This would be a great way to fill in a background with a nice textured tone and then paint your piece over top of it, leaving some showing through for interest. It's also handy simply for texturing; you could easily add some texture to a stone wall to make it pop and feel more real.
I'll cover making your own custom papers as well, but this is getting a little long already so that will be posted tomorrow, followed by how to make custom brushes that will really take advantage of these textures.
Hope you found this helpful! Have a good one!
thank you! looking forward for more
ReplyDelete